Vertex Tools
| Mode: | Edit Mode |
|---|---|
| Menu: | Vertex |
| Hotkey: | Ctrl-V |
This page covers many of the tools in the Vertex menu. These are tools that work primarily on vertex selections, however, some also work with edge or face selections.
Merging
Merging Vertices
This tool allows you to merge all selected vertices to a unique one, dissolving all others. You can choose the location of the surviving vertex in the menu this tool pops up before executing:
At First Only available in Vertex select mode, it will place the remaining vertex at the location of the first one selected. At Last Only available in Vertex select mode, it will place the remaining vertex at the location of the last one selected (the active one). At Center Available in all select modes, it will place the remaining vertex at the center of the selection. At Cursor Available in all select modes, it will place the remaining vertex at the 3D Cursor. Collapse Every island of selected vertices (connected by selected edges) will merge on its own median center, leaving one vertex per island. It is also available via the Mesh ‣ Edges ‣ Collapse menu option…
Merging vertices of course also deletes some edges and faces. But Blender will do everything it can to preserve edges and faces only partly involved in the reunion.
At First and At Last depend on that the selection order is saved: the order is lost, for instance, after changing selection mode.
Auto Merge
| Mode: | Edit Mode |
|---|---|
| Menu: | Sidebar ‣ Options ‣ Tool ‣ Auto Merge |
When the Auto Merge option is enabled, as soon as a vertex moves closer to another one than the Threshold setting, they are automatically merged. This option affects interactive operations only (tweaks made in the Adjust Last Operation panel are considered interactive too). If the exact spot where a vertex is moved contains more than one vertex, then the merge will be performed between the moved vertex and one of those.
Merge by Distance
Merge Distance Sets the distance threshold for merging vertices. Unselected Allows vertices in selection to be merged with unselected vertices. When disabled, selected vertices will only be merged with other selected ones.
Separating
Rip Region
| Mode: | Edit Mode |
|---|---|
| Menu: | Vertex ‣ Rip Vertices |
| Hotkey: | V |
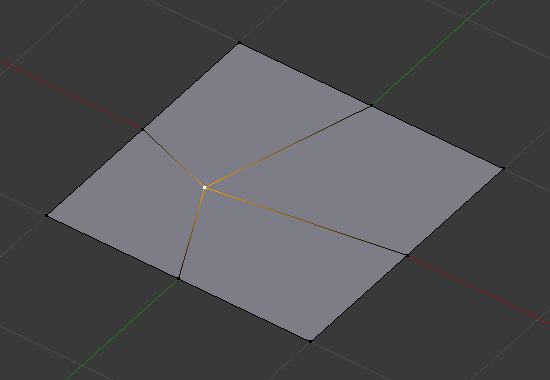
Rip creates a «hole» into a mesh by making a copy of selected vertices and edges, still linked to the neighbor non-selected vertices, so that the new edges are borders of the faces on one side, and the old ones, borders of the faces of the other side of the rip.
Examples
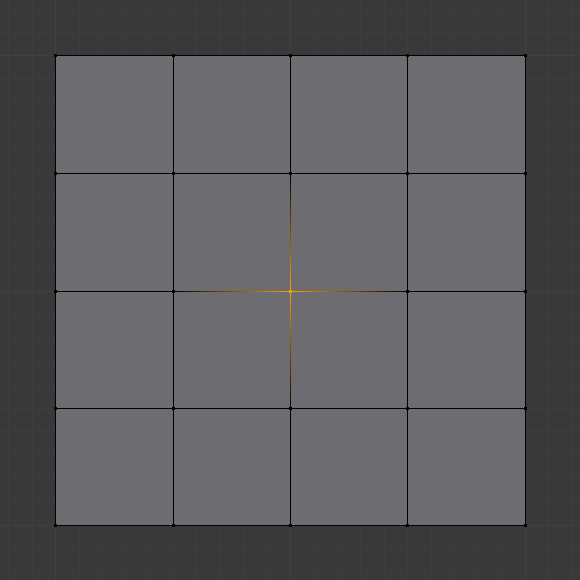
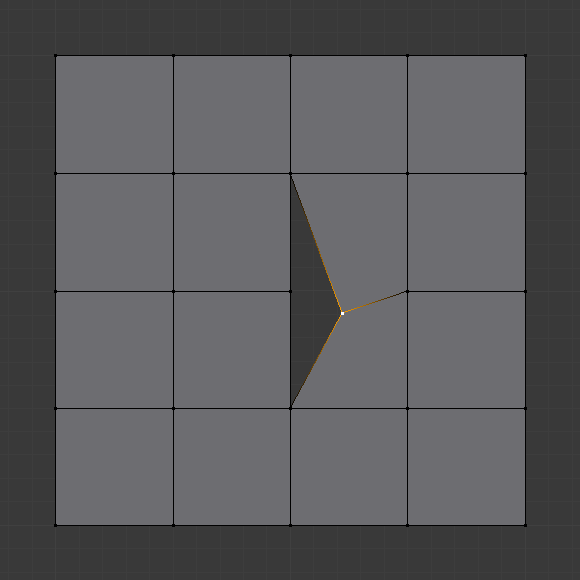
Hole created after using rip on vertex.

Result of rip with edge selection.

A complex selection of vertices.

Result of rip operation.
Limitations
Rip Vertices and Fill
| Mode: | Edit Mode |
|---|---|
| Menu: | Vertex ‣ Rip Vertices and Fill |
| Hotkey: | Alt-V |
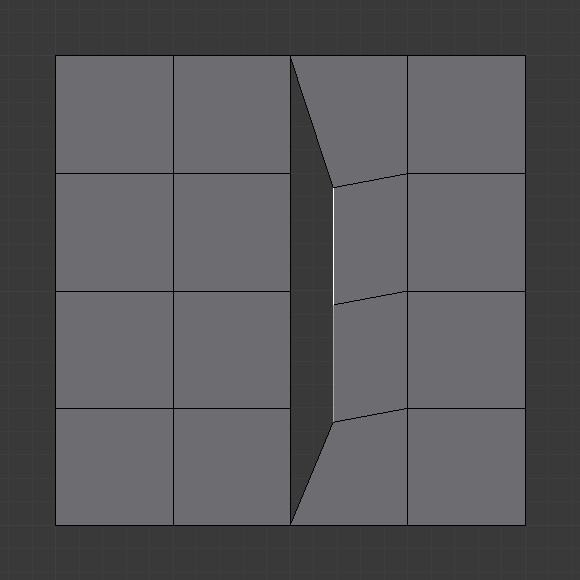
Rip fill works the same as the Rip tool above, but instead of leaving a hole, it fills in the gap with geometry.
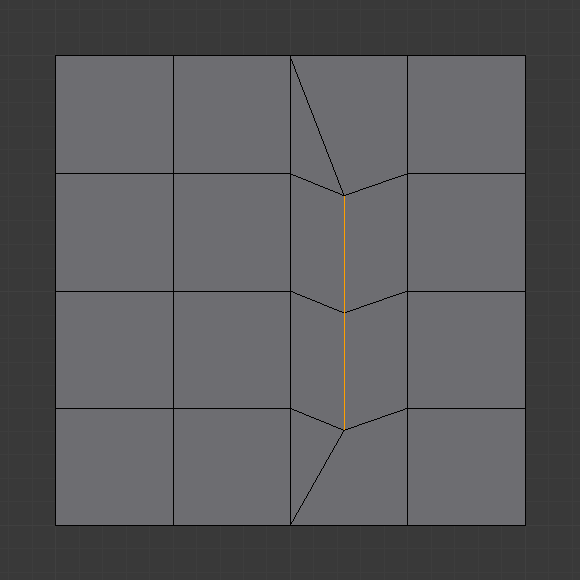
Result of rip fill.
Split
| Mode: | Edit Mode |
|---|---|
| Menu: | Mesh ‣ Split |
| Hotkey: | Y |
Splits (disconnects) the selection from the rest of the mesh. The border edge to any non-selected elements are duplicated.
Note that the «copy» is left exactly at the same position as the original, so you must move it G to see it clearly…
Rip Edge
| Mode: | Edit Mode |
|---|---|
| Menu: | Vertex ‣ Rip Vertices and Extend |
| Hotkey: | Alt-D |
This tool takes any number of selected vertices and duplicate-drags them along the closest edge to the mouse, When extending an edge loop, it extends the vertices at the endpoints of the loop. Which is similar behavior like Extrude tool, but it creates an n-gon.
It helps to easily add details to existing edges.
Separate
| Mode: | Edit Mode |
|---|---|
| Menu: | Mesh ‣ Separate |
| Hotkey: | P |
The Separate tool will Split mesh elements in another mesh object.
Selection Separates the selected elements. By Material Separates fragments based on the materials assigned to the different faces. By loose parts Creates one object for every independent (disconnected) fragment of the original mesh.
Vertex Slide
| Mode: | Edit Mode |
|---|---|
| Menu: | Vertex ‣ Slide Vertices |
| Hotkey: | Shift-V |
Vertex Slide will transform a vertex along one of its adjacent edges. Use Shift-V to activate tool. The nearest selected vertex to the mouse cursor will be the control one. Move the mouse along the direction of the desired edge to specify the vertex position. Then press LMB to confirm the transformation.
Even E By default, the offset value of the vertices is a percentage of the edges length along which they move. When Even mode is active, the vertices are shifted by an absolute value. Flipped F When Flipped is active, vertices move the same distance from adjacent vertices, instead of moving from their original position. Clamp Alt or C Toggle clamping the slide within the edge extents.


| Mode: | Edit Mode |
|---|---|
| Menu: | Mesh ‣ Convex Hull |
The Convex Hull operator takes a point cloud as input and outputs a convex hull surrounding those vertices. If the input contains edges or faces that lie on the convex hull, they can be used in the output as well. This operator can be used as a bridge tool as well.
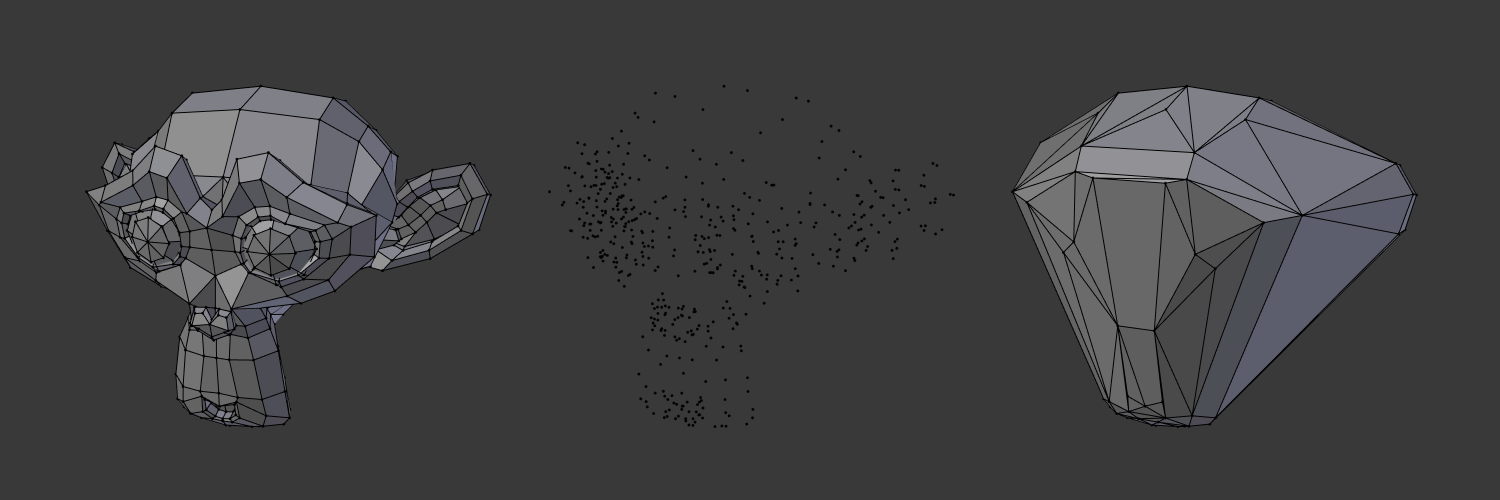
Input mesh, point cloud, and Convex Hull result.
Make Vertex Parent
| Mode: | Edit Mode |
|---|---|
| Menu: | Vertex ‣ Make Vertex Parent |
| Hotkey: | Ctrl-P |
Add Hook
| Mode: | Edit Mode |
|---|---|
| Menu: | Vertex ‣ Hooks |
| Hotkey: | Ctrl-H |
Adds a Hook Modifier (using either a new empty, or the current selected object) linked to the selection. Note that even if it appears in the history menu, this action cannot be undone in Edit Mode – because it involves other objects…
When the current object has no hooks associated, only the 2 first options will appear on the menu.
Hook to New Object Creates a new Hook Modifier for the active object and assigns it to the selected vertices; it also creates an empty at the center of those vertices, which are hooked to it. Hook to Selected Object Does the same as Hook to New Object, but instead of hooking the vertices to a new empty, it hooks them to the selected object (if it exists). There should be only one selected object (besides the mesh being edited). Hook to Selected Object Bone Does the same as Hook to New Object, but it sets the last selected bone in the also selected armature as a target. Assign to Hook The selected vertices are assigned to the chosen hook. For that to happen, a list of the hooks associated to the object is displayed. All the unselected vertices are removed from it (if they were assigned to that particular hook). One vertex can be assigned to more than one hook. Remove Hook Removes the chosen hook (from the displayed list) from the object: the specific Hook Modifier is removed from the modifier stack. Select Hook Selects all vertices assigned to the chosen hook (from the hook list). Reset Hook It’s equivalent to the Reset button of the specific Hook Modifier (chosen from the hook list). Recenter Hook It’s equivalent to the Recenter button of the specific Hook Modifier (chosen from the hook list).
Blend From Shape, Propagate Shapes
| Mode: | Edit Mode |
|---|---|
| Menu: | Vertex ‣ Blend From Shape and Vertex ‣ Shape Propagate |
Shape Propagate Apply selected vertex locations to all other shape keys. Blend From Shape Blend in the shape from a shape key.
© Copyright : This page is licensed under a CC-BY-SA 4.0 Int. License
Vertex Groups PanelпѓЃ
Object Data tab ‣ Vertex Groups
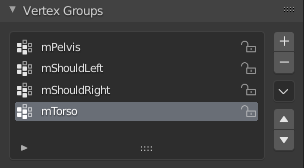
The Vertex Group panel. пѓЃ
Vertex groups are maintained within the Object Data Properties, in the Vertex Groups panel.
Active Vertex Group
Locks the group from being editable. You can only rename or delete the group.
Create an empty vertex group.
Deletes the active vertex group.
Specials Sort by Name
Sorts vertex groups alphabetically.
Sort by Bone Hierarchy
Add a copy of the active vertex group as a new group. The new group will be named like the original group with В«_copyВ» appended at the end of its name. And it will contain associations to exactly the same vertices with the exact same weights as in the source vertex group.
Copy Vertex Group to Selected
Copy all vertex groups to other selected objects provided they have matching indices (typically this is true for copies of the mesh which are only deformed and not otherwise edited).
Mirror Vertex Group
Mirrors weights and/or flips group names. See Mirror Vertex Group for more information.
Mirror Vertex Group (Topology)
Performs the Mirror Vertex Group with the Topology Mirror option enabled.
Remove from All Groups
Unassigns the selected vertices from all (even locked) groups. After this operation has been performed, the vertices will no longer be contained in any vertex group. (Not available for locked groups.)
Clear Active Group
Remove all assigned vertices from the active group. The group is made empty. Note that the vertices may still be assigned to other vertex groups of the object. (Not available for locked groups.)
Delete All Unlocked Groups
Remove all vertex groups from the object that are not locked.
Blender. Работа с вертексами?

И еще, как удалять лишние вертексы? Есть в Blender аналог Scrap vertex?

Заходишь в Edit Mode Блендера выделяешь все точки которые тебе нужны, жмешь Alt-M появиться окошко с выбором как тебе их соеденить в центре относительно точек, относительно курсора, либо объеденить к первой точке которую ты выбрал.
Удаление точек так же происходит в Edit Mode. Выделяешь точку, жмешь Del, появляется меню выбираешь там Vertices если тебе надо удалить точку с прилежащими к ней ребрами. Если же просто нужно стереть точку без удаления ребер то тогда выбери там Dissolve Vertices.
Все что я написал актуально для версии 2.8. Более древние сделаны не по человечески.Там даже выбор чего либо правой кнопкой мыши, а не как у людей. 2.8 уже сделана более удобно.

И еще, как удалять лишние вертексы? Есть в Blender аналог Scrap vertex?
Человек выше новичек в блендере, его не слушай.
По поводу weld. Выделяешь все точки которые нужно завелдить. Далее CTRL+V/Remove double Vertices. И в боковом меню или в окошке (2.8) Выбираешь дистанцию велда.
Remesh
Использование Remesh во вьюпорте.
Preserve (Сохранить):
Так же Remesh сшивает объекты вместе.
Сшивание объектов через Remesh
Quad Remesh
Quad remesh использует алгоритм Quadriflow для создания сетки на основе Quad с несколькими полюсами и краевыми петлями, соответствующими кривизне поверхности. Этот метод относительно медленный, но дает более качественный результат для окончательной топологии.
При нажатии на кнопку появляется меню.
Настройки Quad Remesh
Использование Quad Remesh (Оригинал)
Dyntopo
Изменение сетки при включении Dyntopo
При включении Dyntopo появится предупреждение, если есть настраиваемые данные (модификаторы, UV-развертка, vertex paint).
Предупреждение при включении Dyntopo
Использование Detail Size
Refine Method (Метод изменении топологии):
Использование кисти Simplify.
Multiresolution
Включение Optimal Display
Subdivisions (Подразделить):
Пример использования Unsubdivide
Shape (Форма):
Сначала выберите объект с соответствующей топологией, затем объект с Multires, на котором вы хотите изменить форму, и нажмите Reshape. На сложных объектах может вызывать артефакты.
Generate:
Применение Rebild Subdivisions
Advanced (Продвинутые):
Subdivision Type: Тип подразделения Catmull-Clark или Simple.
UV Smooth (Сглаживание UV):
Boundary Smooth (Граница сглаживания) (в 2.91):